PLASTICS
 airbox and airbox covers
 NUMBER PLATE
 LOVER FORK COVERS
 INGNITION & CLUTCH COVER
 TANK COVER
 MUD FLAP
 SKID PLATES
 FRAME PROTECTOR
 HEADLIGHT MASK
 SIDE PANELS
 TAIL LIGHT FENDER
 FRONT FENDER
 RADIATOR SCOOPS
 REAR FENDER
 UNIVERSAL FENDER
 BRAKES
 BRAKE DISCS & BOLTS
 BRAKE PADS
 CALIPERS & BRAKE PUMPS
 BRAKE PEDAL
 BRAKE HOSE
 DISC COVER
 ENGINE PARTS
 GASKETS & SEALS
 CARBURETOR
 BEARINGS
 OIL PLUG
 PISTON SETS
 TIMING CHAINS
 CLUTCH & ACCESSORIES
 Trysky
 CYLINDER HEAD
 engine covers
 WATER PUMP
 HANDGUARDS
  HANDGUARDS
 HANDGUARD ACCESSORIES
 GRIPS
GRIPS THROTTLE TUBE
 GRIP ACCESSORIES
 FILTERS
 AIR FILTER COVER
 OIL FILTER
 NET AIR FILTER
 AIR FILTER
 FUEL FILTER
 RADIATOR
 RADIATORS
 RADIATOR LOUVERS
 RADIATOR BRACES
 RADIATOR HOSES
 WHEELS
 BEARINGS
 SPOKES
 SPACERS
 NUTS
NUTS WHEELS & RIMS
 TPS SENSOR COVER
 SWINGARM & LINKAGE
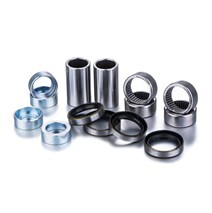
 LINKAGE KIT
 KETTENBLOCK
 LINKAGE COVERS
 SWINGARM PROTECTION
 CABLES
 TANKS
TANKS ADDITIONAL TANKS
 TANK CAPS
 TANK VALVES
 TANK PARTS
 LEVERS AND PERCH
 SHIFT LEVERS
 SPARK PLUG
  STEERING
 HANDLEBARS
 CLAMPS
 STEERING NECK
 CROSSBAR PAD
 HANDLEBAR ACCESORIES
 CHAIN SET
 FRONT SPROCKETS
 SPROCKETS & SCREWS
 CHAINROLLER
 SPROCKET COVERS
  ke kolečkům
 CHAIN GUIDES
 BOLT SETS
 SEATS
SEATS SEAT
SEAT SEATFOAM
 SEAT COVER
 FOOTPEGS
 FOOTPEGS
 SPRINGS & PINS
 PROTECTORS
 HEADLIGHTS
 SHOCK ABSORBERS
 SIMERINGS & DUSTERS
 SET OF BUSHINGS
 bleeder screw
 sleeves for forks
 rear shock sleeves
 REAR SHOCK ATTACHMENT
 LAUNCH HELPER
 EXHAUST
 EXHAUST PROTECTION
 COTTON WOOL
 PLUGS
PLUGS HEAT-RESISTANT FOIL
 CONNECTING RUUBBER
 SPRINGS
 REPAIR KITS
 SILENTBLOCK


 HELMETS
 FULL FACE
 FLIP-UP
 ADVENTURE
 OPEN
OPEN JUNIOR
 RETRO
RETRO women's
 ACCESSORIES
 GOGGLES
 GLASS, TEARS OFF...
 PROTECTION
 CHEST PROTECTORS
 NECK BRACES
 KIDNEY BELTS
 ELBOW PROTECTORS
 KNEE GUARDS
 BACKBONE
 BODY ARMOUR
 JUNIOR
 BOOTS
BOOTS travel
 ANKLE
ANKLE ENDURO
 JUNIOR
 soles and more
 Boots
Boots on a scooter
 JERSEYS
 JUNIOR
 JACKETS
 ENDURO
 women
women REFLECTIVE
 PANTS
PANTS ENDURO
 TEXTILIE
  jeans
jeans summer
 GLOVES
 WINTER
 ENDURO
 summer
 WATERPROOF
 vložky do rukavic
 SOCKS
SOCKS WATERPOOF GEAR
 VESTS
VESTS Accessories for bikers
 HOODS
HOODS SCARF
SCARF belts
belts drobnosti
 THERMO UNDERWEAR
 THERMO T-SHIRTS
 THERMO PANTS
 THERMO KNEE SOCKS
 leisurewear
 leisure jackets
 leisure trousers
 T-SHIRTS
 trika-uni
 Children's T-shirts
 Mini T-shirts
 Sweatpants
 Headwear
 HAT
HAT SWEATSHIRT
 shorts
 friee time
 SOFT PANTS
 MEFO MOUSSE
 MOUSSE GEL
 MOUSSE KIT
 10"
10" 12"
12" 14"
14" 16"
16" 17"
17" 18"
18" 19"
19" 20"
20" 21"
21" TUBE
TUBE 4"
4" 5"
5" 6"
6" 8"
8" 9"
9" 10"
10" 12"
12" 13"
13" 14"
14" 15"
15" 16"
16" 17"
17" 18"
18" 19"
19" 21"
21" 22"
22" 23"
23" HALTERS
 MX TIRE
 10"
10" 12"
12" 14"
14" 15"
15" 16"
16" 17"
17" 18"
18" 19"
19" 20"
20" 21"
21" ENDURO TIRE
 ROAD TIRE
 15"
15" 23"
23" 4"-6,5"
 8"
8" 13"
13" TOOLS
TOOLS Wrenches, hooks, screwdrivers
 TIRE LEVERS
  CHAIN BREAKERS
 Preparations for shocks
 Preparations for wheels
 Engine preparations
 Preparations for bearings
 OTHER MOTO TOOLS
 GRAPHICKITS, NUMBERS
 Canisters, measuring cups
 TRANSPORT
 CARPETS
 MOTORCYCLE COVERS
 HOURMETER
 helpers for track and training
 STAND
STAND HYDRATION BAGS
 PIT BOARD, MARKER
 MOTO LUGGAGE
 BACKPACKS
 WAIST PACKS
 FORK OIL
 AIR FILTER OIL
 CHAIN LUBES
 COOLANT FLUID
 BRAKE FLUID
 CLEANER AND IMPREGNATION
 additives
 VOUCHERS
 KEYCHAINS
 WRISTBANDS
 STAND
STAND PLATE
PLATE BOOK
BOOK WEAR SALE
 HELMETS SALE
 dresy a kalhoty
 doplňky
 LEVERS SALE
110/100-18 Terra Force MX MH
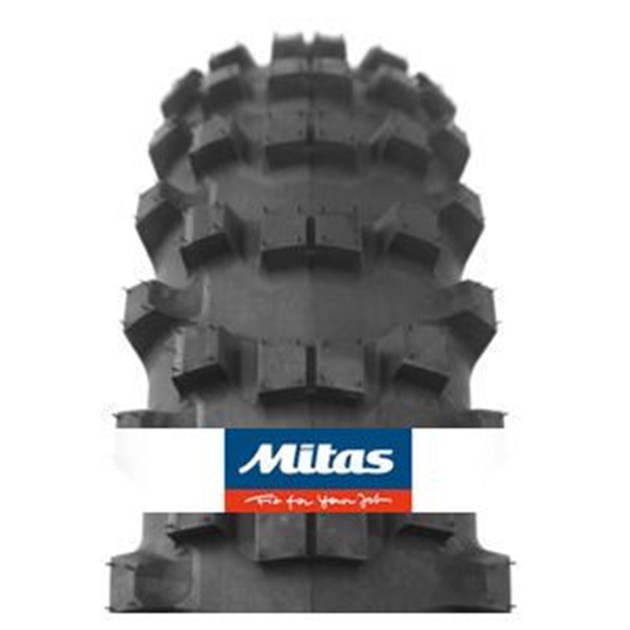
Brands: MITAS
Address:
SKU: MITAS*110/100*18TFMXMH
close
Supplier/manufacturer details
Name: Continental Barum s.r.o.
Address:
Objízdná 1628
Otrokovice
76502
Česká republika
Otrokovice
76502
Česká republika
The TERRA FORCE-MX MH is a high-performance motocross racing tyre for medium to hard terrain. The rear tire lugs offer maximum traction in all terrain Show all
Not in stock
The TERRA FORCE-MX MH is a high-performance motocross racing tyre for medium to hard terrain. The rear tire lugs offer maximum traction in all terrain applications. The surface area and new compound structure provide a balance between stiffness, reliability and long-term performance. The tread pattern is designed for maximum traction, even in changing terrain conditions, to ensure maximum speed and ride control. The wide spacing between the central lugs ensures maximum traction on moderate terrain.The lugs have an arrow-shaped layout and the side lugs provide instant directional precision.
The Mitas TERRA FORCE-MX has been developed in collaboration with many professional motocross riders on a variety of tracks and terrain types. The new range is offered in three patterns to meet the requirements of all types of terrain.
MH - medium/hard
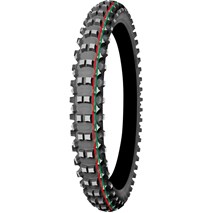
Tyre branding for motocross and enduro:
Red stripe - tyre marking for motocross.
Yellow stripe - tyres with softer compounds suitable for FIM enduro and cross country competitions
Green stripe - tyres with softer carcass and soft tread for hard enduro competitions
Double green stripe - tyres with softer carcass and very soft tread compound for extreme hard enduro competitions
White stripe - tyres for winter use, motoskyöring and motocross on ice
No stripe tyres - classic motocross tyres
Use and maintenance
Store tires clean and away from sources of heat, light, ozone or hydrocarbons. Avoid prolonged exposure of tyres to direct sunlight. Avoid any contact with grease, petrol, volatile solvents or other agents that may damage the rubber. Avoid horizontal storage of tubeless tyres, only small tyres can be stored horizontally (maximum 6 months). If tyres are stored horizontally, they must be placed tooth to tooth. If tyres are stored mounted on the rim, reduce the inflation pressure. Make sure there is no water or moisture inside the tyre. Never store tyres directly in contact with the ground for long periods of time. For safety reasons, tyres should only be repaired by experts using the correct methods and tools. When loading a tyre, the relationship between speed, inflation pressure and load capacity must be taken into account. Overloading causes premature destruction of the tyre. Use the technical documentation and inflation tables that define the load and inflation for different operating speeds.Underinflation not only causes improper rolling of the tyre, but also liner separation or other damage to the tyre liners. Over-inflation increases the hardness of the tyre and reduces the resistance to impacts leading to damage to the tyre liners.
Assembly and disassembly instructions
Mounting and dismounting tyres can be dangerous and should only be carried out by trained and qualified personnel using the correct tools and working procedures. Failure to follow these procedures may result in incorrect fitting of the tire to the rim, resulting in destruction of the tire with explosive force that can cause serious injury or death. Make sure the rim, tire and tube are compatible. Check that the tyre is suitable for the equipment/machine. Use only rims recommended or approved by the tire manufacturer. Always use only the correct special equipment and tools. The rim must be clean and in perfect condition (not damaged etc.), if necessary clean the rim with sandpaper. Under no circumstances mount tyres on rims that are cracked, seriously deformed, have welding repair marks, etc. Carefully inspect the inside as well as the outside of the tyre to identify any damage. If the extent of the damage does not allow repair, the tyre should be devalued. If mounting with a tube, always use the correct new tube and liner for the size. For mounting tubeless tires, on tubeless rims, always use a new tubeless valve.Lubricate the rim and bead before mounting. Use only a suitable lubricant that will not destroy the tyre (never use silicone or petrol based lubricants). Vertical mounting is recommended. In the case of horizontal mounting, it is essential to check that the bottom bead is seated correctly. Fit the casing onto the rim opposite the valve hole (respect the direction of rotation indicated by the arrows). Using the mounting lever, gradually slide the first bead over the rim rim rim rim. Then insert a lightly inflated inner tube, sufficiently treated with a slip joint (if fitted), into the rim. Position the valve and secure it lightly with the retaining ring. Fit the second foot, working in sequence so that you end up at the valve. Remove the valve liner to seat and center the shell properly. Slowly inflate and check for proper seating of the casing foot. Ensure that the casing foot has not pinched the inner tube.Maintain a safe distance during inflation, always use a safety cage, preferably attached to a wall or safety chain. During pressure readings, make sure that no part of your body is in the possible trajectory of the valve internals or its cap. It is recommended to use a suitable device to limit the inflation pressure. Use a filter and dehumidifier for the compressed air necessary to remove moisture and dust. If the feet are not seated properly, bleed, re-prime and re-inflate. Repeat this operation until the feet are seated correctly. If all previous operations have been performed correctly, fit the valve liner. Inflate the tyre according to the load. Ensure that the valve does not touch the rim, brake drums or other mechanical parts. Disassembly Never attempt to remove the bead of an inflated tyre. Always remove the valve inner liner. Check that the tyre is completely free of air before dismounting. Never use tools that may damage the rim or tire beads.
Call us, we are glad to help...

Jiri Fulin
Bike lover & your support
+420 736 164 904
obchod@mefo.cz
arrow1
arrow1
arrow1
arrow1
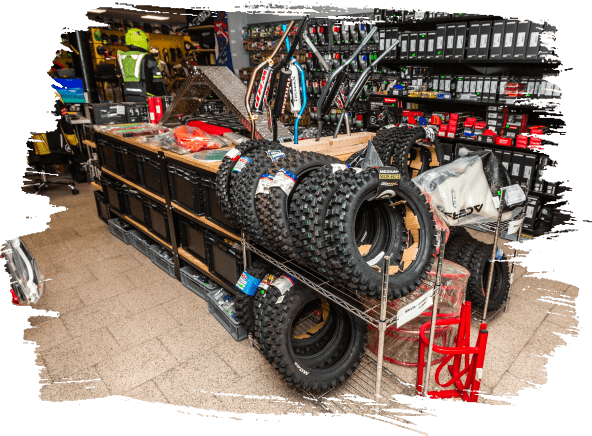
Our Store
A wide range of products and excellent service.
Not far from Strakonice, in the small village of Jinín next to the world-famous motocross track, you will find our MEFO store. Here, you will always be greeted by friendly salespeople who will be at your disposal throughout your entire shopping experience.