MOTORCYCLES PLASTICS
 AIR BOX & AIR BOX COVER
 EXHAUST PROTECTION
 HANDGUARDS
  LOVER FORK COVERS
 SWINGARM PROTECTION
 TANK COVER
 MUD FLAP
 SKID PLATE
 DISC COVER
 FRAME PROTECTOR
 INGNITION & CLUTCH COVER
 HEADLIGHT MASK
 RADIATOR LOUVERS
  TANK
TANK SIDE PANELS
 FRONT FENDER
 FRONT NUMBER PLATE
 SEAT
SEAT RADIATOR SCOOPS
 PLASTIC SCREWS
 CHAIN GUIDE
 REAR FENDER
 FILTERS
 AIRBOX COVER
 OIL FILTER
 DUST FILTER
 ENGINE PARTS
 SEALS
SEALS CYLINDER HEAD
 CARBURETOR
 CRANKSHAFT
 FRICTION PLATES
 PISTON KIT
 TIMING CHAIN
 CLUTCH & ACCESSORIES
 SPARK PLUG AND ELECTRO
 engine covers
 CHASSIS PARTS
 CALIPER REBUILD KIT
 BRAKE PADS
 BRAKE DISC & BOLTS
 BRAKE PEDAL
 HOSE
HOSE COOLER
 WHEELS, RIMS & SPOKE
 SWINGARM
 CABLE
CABLE LEVERS & PERCH
 THROTTLE TUBE
 SEALS
SEALS SHIFT LEVER
 SPROCKET & SCREW
 FRONT SPROCKET
 STEERING
 LINKAGE KIT
 LAUNCH CONTROLS
 FOOTPEGS
 SHOCK ABSORBERS
 EXHAUST


 helmets
 adventure
 junior
 retro
retro accessories
 goggles
 GLASS, TEARS OFF...
 PROTECTION
 BODY PROTECTOR
 NECK PROTECTOR
 KIDNEY BELT
 ELBOW GUARDS
 KNEE GRUARDS
 JUNIOR PROTECTOR
 BOOTS OFF ROAD/DUAL ROAD
 travel
 ankle boots
 touring enduro
 junior
 soles and more
 jersey
 JUNIOR
 JACKET
 TEXTILE/ENDURO
 back rpotector
 PANTS
PANTS junior
 TEXTILIE
  GLOVES
 dual road
 T-SHIRTS
 SOCKS
SOCKS WATERPOOF GEAR
 CAP, NECK
 SWEATSHIRT
 VEST
VEST GRAPHICKITS, NUMBERS
 HANDGUARDS
 MOTOCROSS/ENDURO
 ATV (QUAD)
 DUAL ROAD
 HANDGUARDS MOUNTS
 COMPLET THROTTLE
 TRANSPORT
 TOOLS
TOOLS SPANNER & SPRING TOOL
 TIRE IRON
  CHAIN BREAKER
 OTHER MOTO TOOLS
 OIL, CLEANER
 FORK OIL
 MOTOR OIL
 GEAR OIL
 AIR FILTER OIL
 CHAIN LUBE
 COOLANT FLUID
 BRAKE FLUID
 OTHER
OTHER CLEANER & IMPREGNATION
 EXTRA TANKS
 ADDITIONAL TANKS
 TANK CAP
 ACCESSORIES
 GRIPS
GRIPS CHAIN, CHAINROLLER
 HANDLEBAR
 STAND
STAND HEADLIGHTS
 DRINK BAG
 MOTORCYCLE BACPACK
 WAIST PACK
 BAGS
BAGS TUNING ACCESSORIES
 TOYS & CAMERA
  SLIDER BRACKET
 for exhaust
 CYLINDER COVER
 OTHER ACCESSORIES
 SUPERMOTO FENDER
 UNIVERSAL FENDER
 FORK COVERS
 GAS CAN & LIQUID BREAKERS
 CARPET, COVER
 HOURMETER
 MUD FLAP
 TENT
TENT SCREWS
 CARBURETOR-JET
  PIT BOARD & MARKER
 MX TIRE
 ENDURO TIRE
 ROAD TIRE
 MOUSSE
 TUBE
TUBE TIRE HOLDER, TIRE IRON
 MTB JERSEY
 MTB PANTS
 MTB ACCESSORIES
 helmy
helmy ACERBIS
 ZAP TECHNIX
 MEFO MOUSSE
 WRP
WRP ARMOR VISION
 POLISPORT
 ARI
ARI BOLT
BOLT BO OIL
 BRENIX
 DID
DID DP BRAKES
 ESJOT
ESJOT GOLDFREN
 HEIDENAU
 HIFLO
HIFLO MITAKA
 MITAS
MITAS MOTOREX
 MOTUL
MOTUL MULTI AIR
 NGK
NGK PROGRIP
 PROX
PROX VEE RUBBER
 VERTEX
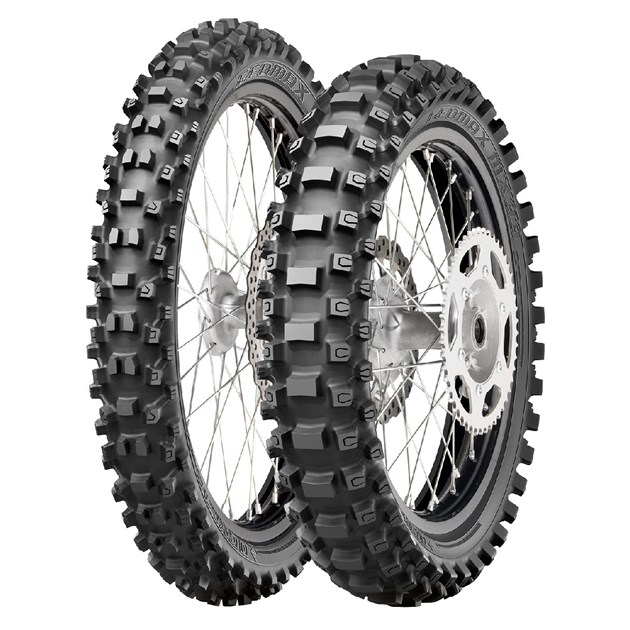
Dunlop 70/100-10 mx33
Manufacturer: DUNLOP
SKU: DUNLOP*70/100*10MX33
Geomax MX33 successor to the MX3S soft terrain tyre. Geomax MX33 tyres for driving on variable surfaces. Improved tread with connectors between the sh Show all
Not in stock
Geomax MX33 successor to the MX3S soft terrain tyre. Geomax MX33 tyres for driving on variable surfaces. Improved tread with connectors between the shoulder blocks, which together with the new block layout increases resistance to cracking when riding on hard surfaces. Dunlop has also incorporated its Carcass Tension Control System into the new tyre, further improving ride feel and handling.
Product parameters
Brand: Dunlop
Terrain: Sand, Mud, Medium Terrain, Hard Surface
Design: MX33
Width: 70
Profile: 100
Dimensions in inches: 10
Load index: 41 (145 kg)
Speed index: J (100 km/h)
TT/TL: Normal (TT)
Position: Rear
Use and maintenance
Store tyres clean and away from sources of heat, light, ozone or hydrocarbons. Avoid prolonged exposure of tyres to direct sunlight.Avoid any contact with grease, petrol, volatile solvents or other agents that may damage the rubber. Avoid horizontal storage of tubeless tyres, only small tyres can be stored horizontally (maximum 6 months). If tyres are stored horizontally, they must be placed tooth to tooth. If tyres are stored mounted on the rim, reduce the inflation pressure.Make sure there is no water or moisture inside the tyre. Never store tyres in direct contact with the ground for long periods of time. For safety reasons, tyres should only be repaired by experts using the correct methods and tools. When loading a tyre, the relationship between speed, inflation pressure and load capacity must be taken into account. Overloading causes premature destruction of the tyre. Use technical documentation and inflation tables that define the load and inflation for different operating speeds. Under-inflation is not only caused by improper run-flatting, but also by liner separation or other damage to the tyre liners. Overinflation increases the hardness of the tyre and reduces the resistance to impacts leading to damage to the tyre liners.
Mounting and dismounting instructions
Fitting and removing tyres can be dangerous and should only be carried out by trained and qualified personnel using the correct tools and working procedures. Failure to follow these procedures may result in incorrect fitting of the tyre to the rim and subsequently cause the tyre to be destroyed with explosive force, which can cause serious injury or death. Make sure the rim, tire and tube are compatible. Check that the tyre is suitable for the equipment/machine. Use only rims recommended or approved by the tire manufacturer. Always use only the correct special equipment and tools. The rim must be clean and in perfect condition (not damaged etc.), if necessary clean the rim with sandpaper. Under no circumstances fit tyres to rims that are cracked, seriously deformed, have welding repair marks, etc.Carefully inspect the inside as well as the outside of the tyre to identify any damage. If the extent of the damage does not allow repair, the tyre should be devalued. If mounting with a tube, always use the correct new tube and liner for the size. For mounting tubeless tires, on tubeless rims, always use a new tubeless valve.Lubricate the rim and bead before mounting. Use only a suitable lubricant that will not destroy the tire (never use silicone or gasoline based lubricants).Vertical mounting is recommended. In the case of horizontal mounting, it is essential to check that the bottom bead fits correctly.Fit the tyre onto the rim opposite the valve hole (respect the direction of rotation indicated by the arrows). Using the mounting lever, gradually slide the first bead over the rim rim rim rim. Then insert a lightly inflated inner tube, sufficiently treated with a slip joint (if fitted), into the rim. Position the valve and secure it lightly with the retaining ring. Insert the second foot, working in sequence so that you end up at the valve.To seat and centre the shell correctly, remove the inner valve liner. Slowly inflate and check for proper seating of the casing foot. Make sure the casing foot has not pinched the soul. Maintain a safe distance during the densification process, always use a safety cage, preferably attached to a wall or safety chain. During pressure readings, make sure that no part of your body is in the possible trajectory of the valve internals or its cap. It is recommended to use a suitable device to limit the inflation pressure. Use a filter and dehumidifier for the compressed air necessary to remove moisture and dust.If the feet are not seated properly, release the air, re-pressurize and inflate. Repeat this operation until the feet are seated correctly. If all the previous operations have been carried out correctly, fit the inner valve insert. Inflate the tyre according to the load Make sure that the valve does not touch the rim, brake drums or other mechanical parts.RemovalNever attempt to remove the beads of an inflated tyre. Always remove the inner valve insert. Check that the tyre is completely free of air before dismounting. Never use tools that may damage the rim or tire beads.
Call us, we are glad to help...

Jiri Fulin
Bike lover & your support
+420 736 164 904
obchod@mefo.cz