 WEAR SALE
 HELMETS SALE
 TRavel
 gloves
  GOGGLES & GLASSES
 Protectors %
 Boots %
 Jackets %
 Pants %
 PLASTICS SALE
  feders
 tables and masks
 spoilers
  frame cover
  Swingarm covers
 Raptor
 engine cover covers
 rear fenders
 radiator covers
 chain guides
 seat covers
 fork protectors
 engine covers
 handles
  lever protectors
 LEVERS SALE
 FILTERS FOR MOTO sale
 wheels and repair kits
 gas handles
 silencer parts
 chassis parts
 TOOLS SALE
 Brake pads
  cables on motorbike sale
 gears
gears bags and backpacks
 tyres and tubes
  screws


 airbox and airbox covers
 UNIVERSAL FENDER
 TANK COVER
 Front disc covers
 MUD FLAP
 HEADLIGHT MASK
 TAIL LIGHT FENDER
 BRAKES
 BRAKE DISCS & BOLTS
 CALIPERS & BRAKE PUMPS
 BRAKE PEDAL
 BRAKE HOSE
 ENGINE PARTS
 GASKETS & SEALS
 CARBURETOR
 BEARINGS
 OIL PLUG
 PISTON SETS
 TIMING CHAINS
 CLUTCH & ACCESSORIES
 Nozzles
 CYLINDER HEAD
 engine covers
 WATER PUMP
 CONNECTING ROD KIT
 AIR FILTER COVER
 OIL FILTER
 NET AIR FILTER
 AIR FILTER
 FUEL FILTER
 HANDGUARDS
  OPEN
OPEN CLOSED
 CLOSED UNIVERSAL
 HANDGUARD ACCESSORIES
 RADIATOR
 RADIATORS
 RADIATOR BRACES
 RADIATOR HOSES
 BEARINGS
 SPOKES
 SPACERS
 NUTS
NUTS WHEELS & RIMS
 TPS SENSOR COVER
 SWINGARM & LINKAGE
 LINKAGE KIT
 KETTENBLOCK
 LINKAGE COVERS
 TANKS
TANKS ADDITIONAL TANKS
 TANK CAPS
 TANK VALVES
 TANK PARTS
 GRIP ACCESSORIES
 CHAIN SET
 FRONT SPROCKETS
 SPROCKETS & SCREWS
 CHAINROLLER
 SPROCKET COVERS
  Accessories for chain wheels
 STEERING
 HANDLEBARS
 CLAMPS
 STEERING NECK
 CROSSBAR PAD
 HANDLEBAR ACCESORIES
 SEATS
SEATS SEATFOAM
 SEAT COVER
 FOOTPEGS
 FOOTPEGS
 SPRINGS & PINS
 PROTECTORS
 HEADLIGHTS
 SPARK PLUG
  SEAT
SEAT ENGINE BOLTS
 BRAKE BOLT AND SPROCKET SCREW
 SIMERINGS & DUSTERS
 SET OF BUSHINGS
 bleeder screw
 front shock absorber covers
 rear shock absorber covers
 REAR SHOCK ATTACHMENT
 LAUNCH HELPER
 EXHAUST
 EXHAUST PROTECTION
 COTTON WOOL
 PLUGS
PLUGS HEAT-RESISTANT FOIL
 CONNECTING RUUBBER
 SPRINGS
 REPAIR KITS
 SILENTBLOCK
 Adventure
 rider equipment
 Acerbis carbon
 Acerbis Airstrike-X
 Acerbis T711
 Acerbis Linear
 Acerbis Whoops
 FLIP-UP
 OPEN
OPEN JUNIOR
 RETRO
RETRO ACCESSORIES
 GOGGLES
 GLASS, TEARS OFF...
 PROTECTION
 CHEST PROTECTORS
 NECK BRACES
 KIDNEY BELTS
 ELBOW PROTECTORS
 KNEE GUARDS
 BACKBONE
 JUNIOR
 SOFT PANTS
 travel
 ANKLE
ANKLE ENDURO
 JUNIOR
 soles and more
 Wellies
 on a scooter
 JUNIOR
 ENDURO
 women
women ENDURO
 TEXTILIE
  jeans
jeans summer
 WINTER
 ENDURO
 summer
 WATERPROOF
 women's
  glove liners
 SOCKS
SOCKS WATERPOOF GEAR
 VESTS
VESTS THERMO UNDERWEAR
 THERMO T-SHIRTS
 THERMO PANTS
 THERMO KNEE SOCKS
 leisurewear
 Headwear
 T-SHIRTS
 trika-uni
 Children's T-shirts
 Mini T-shirts
 SWEATSHIRT
 leisure jackets
 FREE TIME SHORTS
 Sweatpants
 Casual shoes
 HOODS
HOODS SCARF
SCARF TOOLS
TOOLS TIRE LEVERS
  CHAIN BREAKERS
 Preparations for shocks
 Preparations for wheels
 Engine preparations
 Preparations for bearings
 OTHER MOTO TOOLS
 GRAPHICKITS, NUMBERS
 Wheel changers
 Canisters, measuring cups
 TRANSPORT
 CARPETS
 MOTORCYCLE COVERS
 HOURMETER
 helpers for track and training
 STAND
STAND HYDRATION BAGS
 PIT BOARD, MARKER
 BACKPACKS
 WAIST PACKS
 VOUCHERS
 STAND
STAND FORK OIL
 AIR FILTER OIL
 CHAIN LUBES
 COOLANT FLUID
 BRAKE FLUID
 CLEANER AND IMPREGNATION
 additives
 MEFO MOUSSE
 10"
10" 12"
12" 14"
14" 16"
16" 17"
17" 18"
18" 19"
19" 20"
20" 21"
21" MOUSSE GEL
 TUBE FOR MOTORCYCLE
 4"
4" 5"
5" 6"
6" 8"
8" 9"
9" 10"
10" 12"
12" 13"
13" 14"
14" 15"
15" 16"
16" 17"
17" 18"
18" 19"
19" 21"
21" 22"
22" 23"
23" 10"
10" 12"
12" 14"
14" 15"
15" 16"
16" 17"
17" 18"
18" 19"
19" 20"
20" 21"
21" ENDURO TIRE
 ROAD TIRE
 15"
15" 23"
23" 4"-6,5"
 8"
8" 13"
13" HALTERS
A nerve-free motocross tire: how to properly mount and remove it
A nerve-free motocross tire: how to properly mount and remove it


When you hear tire irons clanging against the rim in the paddock and catch the smell of soapy emulsion, you know exactly what is going on. Changing a motocross tire is a relaxing ritual for some riders and a nightmare full of pinched tubes and scraped knuckles for others. And nothing is more frustrating than spending an hour in the garage only to find that the tire will not seat on the beads, or that the tube is torn.
In this article, we will guide you through the complete replacement process - from preparing the workshop to the final seating of the beads. This procedure is also used by professional racing teams, for whom speed and precision in the paddock are absolutely essential.

1. PREPARATION: YOU CANNOT DO IT WITHOUT THE RIGHT SETUP
Before you even touch the wheel, you need to prepare your workspace. Changing a motorcycle tire while the bike is lying on its side in the grass is a fast route to bent discs and dirt in the bearings.
- Stability comes first: The first step is to get the bike into the air. A quality motorcycle stand will make sure the bike does not wobble while you are loosening tight wheel axles. For more demanding service work, a motorcycle lift is a great helper and will save your back.
- Equipment: Forget rusty screwdrivers. A prepared set of motorcycle tools should include axle wrenches, a valve tool, and at least three proper wrenches / tire irons at least 35 cm long. The longer the lever, the less effort you need.
- Organization: Keep your equipment clean. A well-organized motorcycle tool box will save you valuable time that you would otherwise spend looking for a lost valve core in the workshop dust.
2. REMOVING THE OLD TIRE
Removal requires a system. If the tire will not come off even with greater force, you are probably doing something wrong in the process.
- Maximum deflation: Unscrew the valve core. With tube-type systems, simply pressing the valve is not enough; you need to remove all the air so the tube does not get pinched when breaking the beads.
- Loosen the rim lock: Loosen the rim lock nut, but do not remove it completely. Leave it on the last few threads so the rim lock does not fall inside the rim.
- Breaking the beads: This stage is a very important moment. The bead must “pop” from the edge of the rim into its deep center (the so-called drop center). A professional motorcycle tire-changing stand with an integrated bead breaker arm will help the most. If you do not have one, you will need to step on the sidewall of the tire with your full weight. If the bead stays stuck on the rim edge, you will never be able to lever the tire over.
- Levering it off: Start on the opposite side from the rim lock. Insert the first tire iron under the bead, place the second one a short distance away, and gradually pull the tire over the rim.
3. INSTALLING THE NEW TIRE
Before fitting the new tire, check the direction of rotation and clean the rim. Proper wheel fitting starts with a clean rim free of scratches and sharp edges.
PROCEDURE FOR STANDARD TUBES:
- Preparing the tube and tire: Slightly inflate the tube before inserting it so it becomes round and is not flattened. It is also recommended to use baby powder (talc) on the surface of the tube, which significantly reduces friction between the tube and the tire and prevents it from sticking.
- Lubricating the beads: Apply mounting paste or soapy water to the beads of the new tire. Good lubrication ensures that the tire smoothly slides into place on the rim during final inflation and is not damaged by the rim edge.
- Fitting the first side: Push the first tire bead onto the rim, ideally starting at the rim lock and working around the entire circumference. Use your tire irons to pull the tire over smoothly without stretching it unnecessarily.
- Inserting the tube and valve: Carefully place the tube into the tire and pull the valve through the hole in the rim. Screw the valve nut on by only a few threads so the valve has some play and can move freely during handling.
- Mounting the second side: Start fitting the tire opposite the valve and finish directly at the valve. Working in small sections (about 5 cm) ensures that you will not need to use extreme force that could pinch the tube.
Pressure (bar) | Recommended situation for the given pressure |
0.8 - 1.0 | Standard pressure for soft terrain (enduro/mud) |
1.1 - 1.3 | Harder ground, rocky tracks, motocross |
PROCEDURE FOR FOAM INSERTS (MOUSSE):
- Gelling (the most important step): A mousse requires an extreme amount of lubrication to survive the high temperatures caused by friction. Apply an entire tube of special gel to the inside of the tire and to the mousse itself. Without gel, the insert can literally crumble into dust within a few hours of riding.
- Inserting the mousse into the tire: Place the mousse inside the tire so there are no empty gaps or waves anywhere. The foam must fill the entire volume of the tire evenly, which ensures stable handling in corners.
- Using a Bead Buddy helper: This tool, inserted between the rim and the tire, holds the already mounted part of the tire in the rim. It works like a “third hand”, freeing both of your hands for working with tire irons around the rest of the tire circumference.
4. Levering the second bead: When levering a mousse, take only very small sections of the bead, no more than 2 to 5 cm at a time.
5. Final seating (mechanical): Because a mousse has no air to expand the tire, you must seat the beads mechanically. Tapping with a rubber mallet, bouncing the wheel on the ground, or taking a short ride at a gentle pace can help. Always visually check the guide line on the sidewall to make sure it is the same distance from the rim all the way around, and finally tighten the rim lock.
Interesting fact: Did you know that mousse inserts have a limited service life? Even if you do not ride with them, they dry out and shrink over time.
MEFO.CZ RECOMMENDS AND ADVISES
- MEFO mousse should ideally be stored at a stable temperature and definitely in a black bag.
- MOUSSE must be kept slippery; special MEFO MOUSSE GEL is used for this.
- NOTHING lasts forever, not even MEFO mousse. It needs to be checked and lubricated regularly.

Source: https://marketing.acerbis.it/gallery/10125-motorbikes/10598-beta/460-beta-2t-2025#galleryD-15
Conclusion: do not underestimate follow-up maintenance
Once the wheel is off, it is the perfect time to inspect the brake pads and check for play in the bearings. Before you head out onto the track, also go through a complete machine-preparation checklist so you can be sure everything is in top condition.
Remember that even motocross for the youngest riders requires the same careful approach to servicing as adult motorcycles. If you do not feel confident changing tires yourself, or if you do not have the right motorcycle tools, stop by a professional service center. For those who want to tackle the job themselves, our e-shop has professional workshop equipment ready to make the work easier.
Our Store
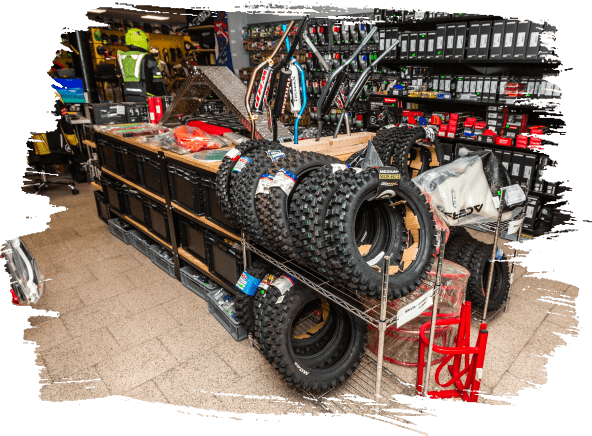
Not far from Strakonice, in the small village of Jinín next to the world-famous motocross track, you will find our MEFO store. Here, you will always be greeted by friendly salespeople who will be at your disposal throughout your entire shopping experience.